Access Panel Construction Tips
By Bill Schertz, KIS Cruiser #4045
I did this with my Elevator, don't see why it wouldn't work with Aileron. Since the control surface is closed off, you have to do everything from one side only. The problem is how to get a nice flush flange on the underside of the panel surface, working only from the outside.
I installed a Mac servo with 1" of travel for the elevator trim.
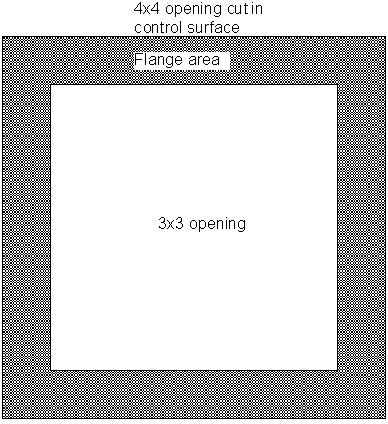
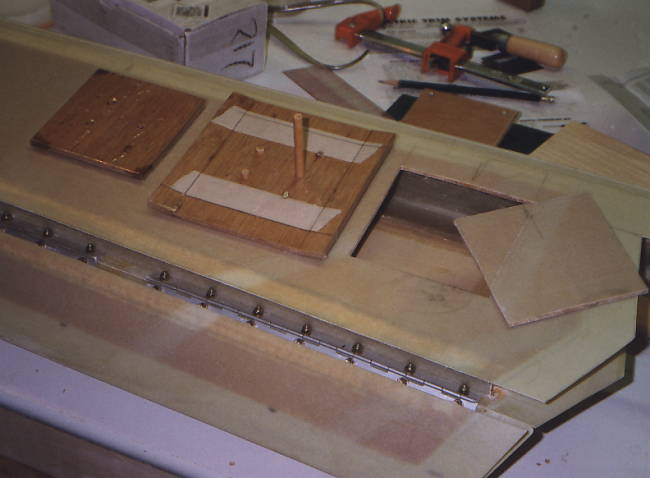
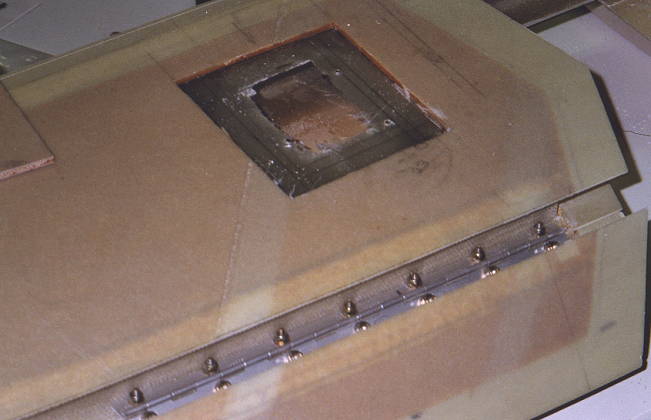
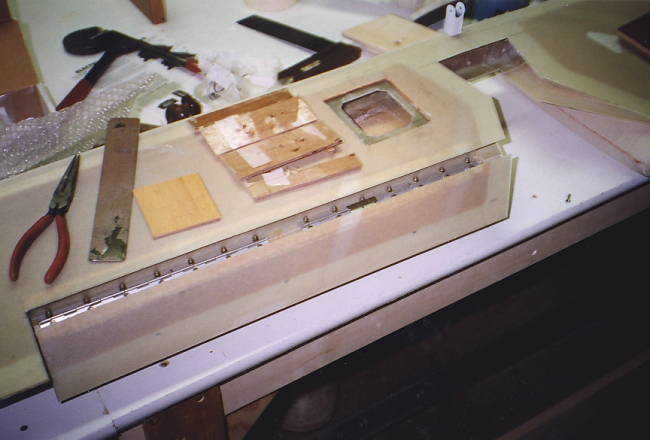
I determined that I wanted a 3"x3" opening, therefore need to cut a 4"x4" opening in the skin to allow for a 1/2" flange.
I fabricated an insert that could be folded into smaller size, that could be put in through the 4" hole, and would support the fiberglass layup while it cured. See drawing below.
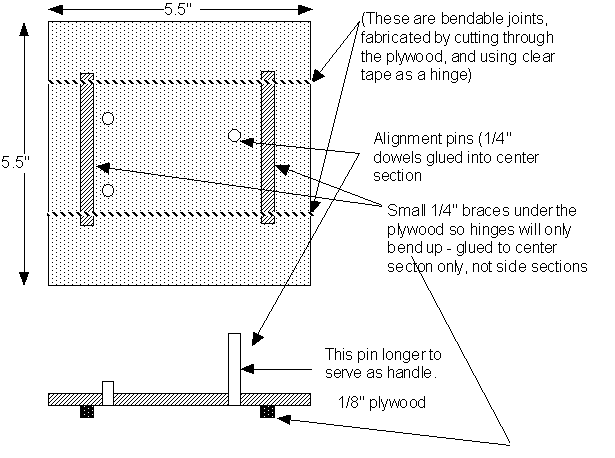
I also cut a piece of plywood that is the SAME dimensions of the opening (4"x4"), and had matching holes for the alignment pins, actually I positioned the 4x4 onto the 5.5x5.5 piece, and then drilled all the holes at one time. This ensures that the pieces will line up properly when assembled in the control surface. I then covered the entire surface of both pieces of plywood with clear packing tape to act as a release agent.
The device when assembled looks like this:

To use,
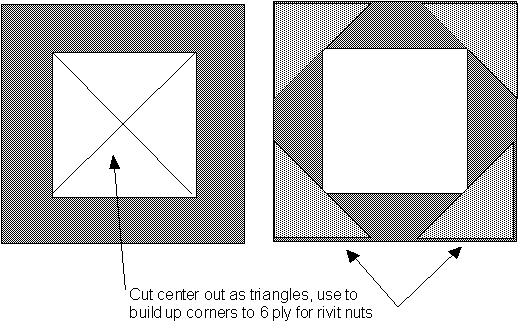
Make up a 3-ply bid between plastic sheets on your work bench, and cut it out to 5.5"x5.5" square. Cut out the center and cut the center diagonally into 4 parts that can be placed on the remaining as corner reinforcements.
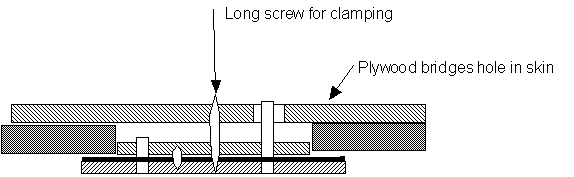
Lay all this on the bottom part of the fixture, and then fold the bottom fixture sufficiently that you can slide it through the opening in the control surface. With it laying (unfolded) on the bottom of the opening, lay on a piece of peel ply (optional, but gives a nice surface to the completed flange that is exposed), insert the top of the fixture over the dowel pins, and fasten with some short screws. This clamps the area of the flange tightly, and presses the peel-ply into the surface. Bring the peel ply up through the hole as you pull the fixture into position, you don't want it to get between the control surface skin and the flange, only over the surface of the flange. I found it easier to just wrap the insert piece with the peel ply and tape it down on the top surface, sort of like wrapping a package.
Then grab the long dowel, and pull the fixture up into position. To hold it tightly against the bottom of the skin, I positioned a piece of plywood over the opening, with a hole (~1/2") that the dowel could easily pass through, and then drove a long screw through the plywood into the fixture to draw it up tight., see below.
 |
 |
 |