KIS Cruiser – Homemade instrument panel
Ray Clegg
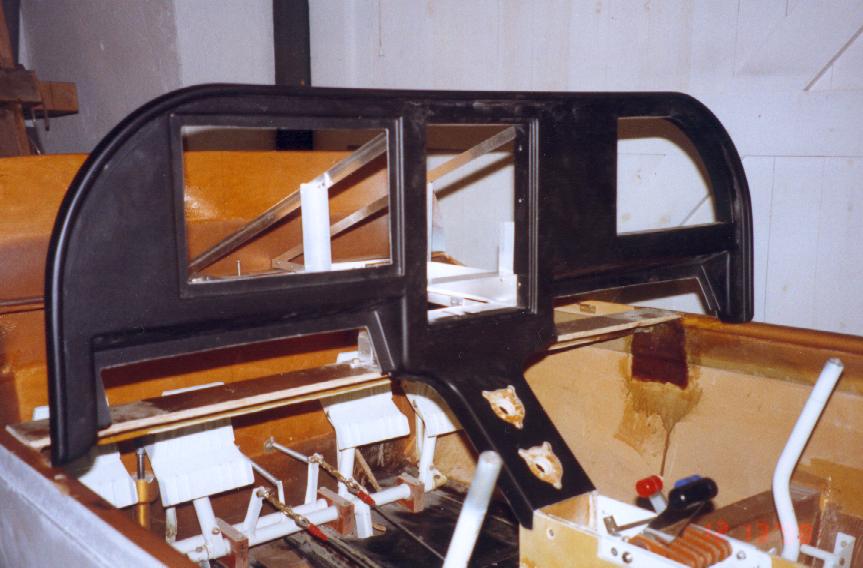
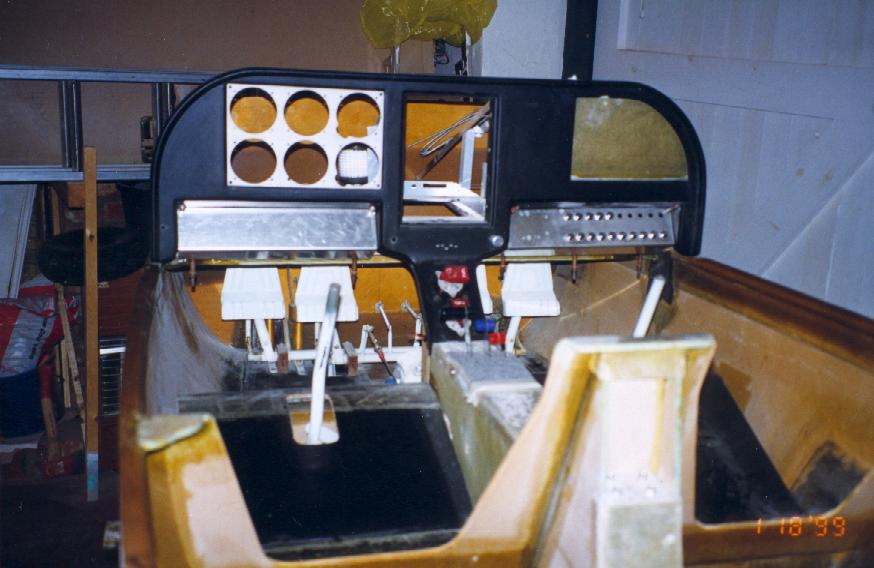
Wanting something different we decided to mould our own instrument panel. The plug was made in MDF and a female mould cast in polyester resin and chopped strand mat. The panel was then made in the mould using epoxy resin and four layers of BID. Recesses were then cut out for removable panels (made in aluminum) I know from my TR-1 that instruments mounted in the lower edge of the panel are not easy to read and so for the Cruiser the lower sub-panels have been canted upwards for easier viewing. Because there are no instruments in front of the P2 position there was no need to tilt the right hand side of the panel to allow for parallax. This also allowed for the large glove box. As well as the removable panels to allow access to the rear the whole instrument panel can be removed when we come to update to full glass cockpit!
|
|
|
|
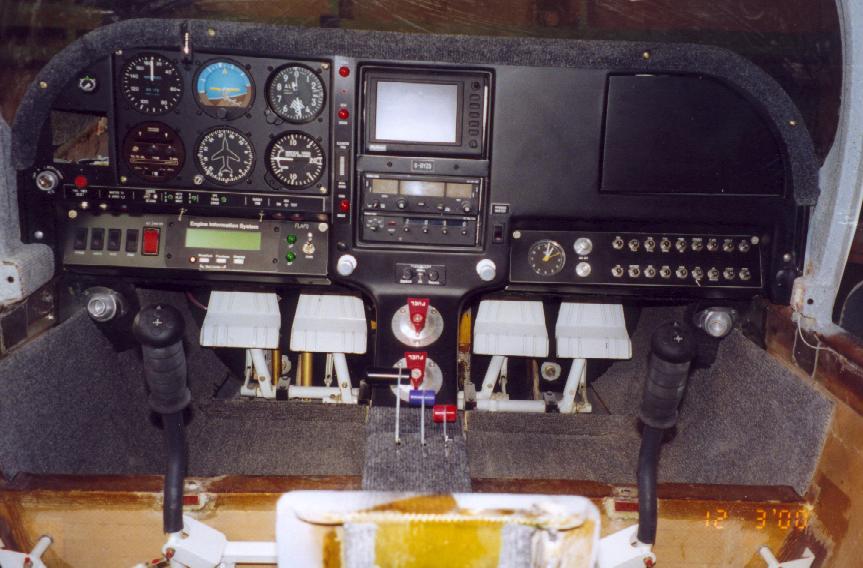
The turn and slip is replaced by a Navaid autopilot and all engine information is displayed on the Engine Information System on the lower sub-panel. To the right of the E.I.S. are two green lights indicating flap position with the electric flap switch to the right of the green lights. To the left of the E.I.S. is the master switch and switches for strobes, electric primer pump, landing lights and pitot heat. In the edge of the coaming between the airspeed and AI is an angle of attack indicator. Whether this will be useful or whether an expensive toy I have yet to find out.
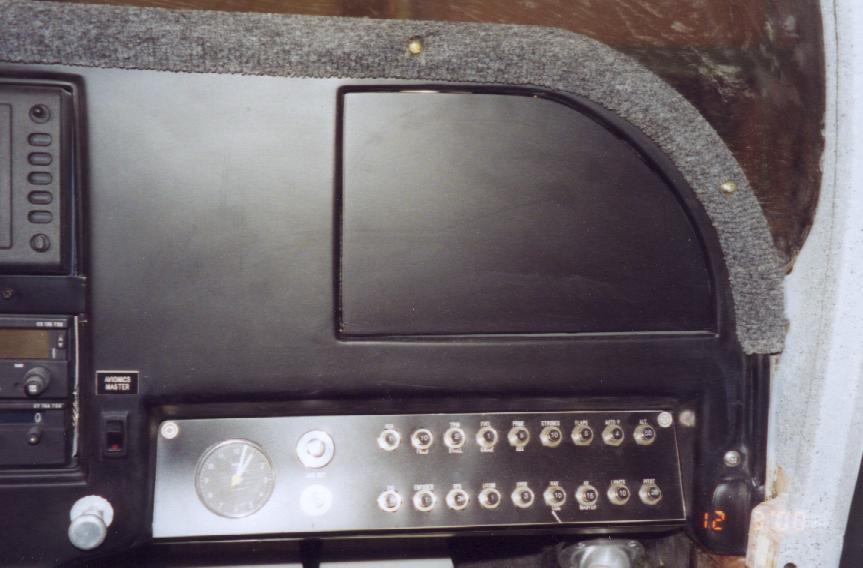
In the centre stack is a Bendix/King transponder and radio/VOR. Above the radio is a Skyforce moving map GPS. The red warning lights between the radio stack and flight instruments are for stall warning (traditional vane type to supplement angle of attack indicator), doors closed warning light - each of the four door closure pin housings contains a micro switch to ensure full closure of the door. The wire to the right front switch can be seen at the bottom of the door frame – the left one is covered by its trim. Incidentally we have fitted each door with two gas struts, one front and one rear. This balances door opening more evenly and reduces twist in the door in its open position. The gas struts were from RS and their pressure is adjustable so they can be tailored to the weight of individual doors. There are instances of flight with gull wing doors where the rear pins have not been properly located and the door has opened (and come off) in flight. Hopefully the warning light will ensure the door is fully latched before take-off. The very small red warning light between the stall and door warning is for carbon monoxide. This is made from a domestic CO warning system. It has its own independent long life battery and is much more reliable than the traditional stick-on warning patch which has a relatively short life and is usually time expired when you fly the aircraft. Below the MAC elevator trim indicator is the parking brake warning light. The parking brake cable knob is as yet unlabelled but below its warning light.
To the right of the transponder is the avionics master switch and below it cabin heat. In the right sub-panel is a clock, auxillary power output (cigar lighter) and a BNC connector for Ian’s hand held Garmin GPS because he can’t understand the instructions for the Skyforce! The circuit breakers occupy the remainder of the panel.
Below the radio stack are two Andair fuel selectors. The top one for right and left front tanks and the lower one for the rear tanks which we hope to fit behind the main spar. This is a long running battle with the PFA who as yet will not approve additional fuel behind the spar because they feel it may affect wing flutter. They do not have sufficient information from Rich regarding wing rib and skin construction, despite him being asked on several occasions, to determine torsional stiffness of the wing and how it would be affected by additional tanks and fuel. It is this lack of information from the factory on this and other matters which has made building so frustrating for all of us over the past few years. Let us hope there will be some improvement. The square gap in the instrument panel to the left of the autopilot is for the four fuel gauges. These are made but not yet fitted.
Behind the lower fuel selector is the home-made throttle quadrant which occupies the space where the manual flap handle would have been.
 |
 |