
N247BR
Tools & Jigs
Used for Construction
| A number of fabrication jigs and specialized tools will be utilized during the construction of the KIS Cruiser or any homebuilt aircraft. Most of these tools and jigs are easily constructed while others may be purchased for use. In this section I will try to detail some of the required jigs as well as some of the tools I have constructed to ease the building process. I hope these will be of help to other builders as well. | |
|
Sandbags /
Weights
|
| SandBags | |
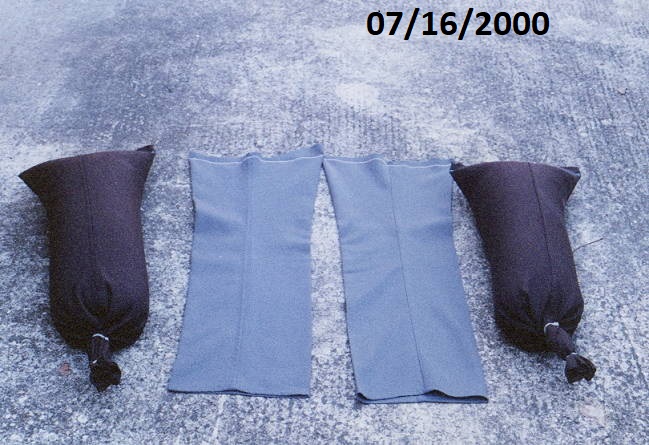 |
Remember those old bell bottom pants hidden in the deep
dark recesses of you closet? (Assuming you are old enough to
remember them. ) How about those old long sleeve shirts with the frayed
cuffs?
Well, dig them out because they make the best sand bags you can find. Cut them off just below the crouch, sew one end to seal, fill with lots of sand and use a couple of nylon ties to seal the top. You now have some good weights for closeout of wings and other parts. Space the ties to give a nice handle. |
| Work Table | |
 |
The work table for the wing jig needs to be both large and
sturdy. The total size is 4 feet wide by at least 12 feet long.
Aside from building the wings I didn't need a table of that size
in my shop. I could use a couple of smaller work benches at home
and figured I would need several smaller tables eventually for working
in the hangar.
Instead of constructing one large table, I constructed six smaller tables of two (2) feet by four (4) feet. |
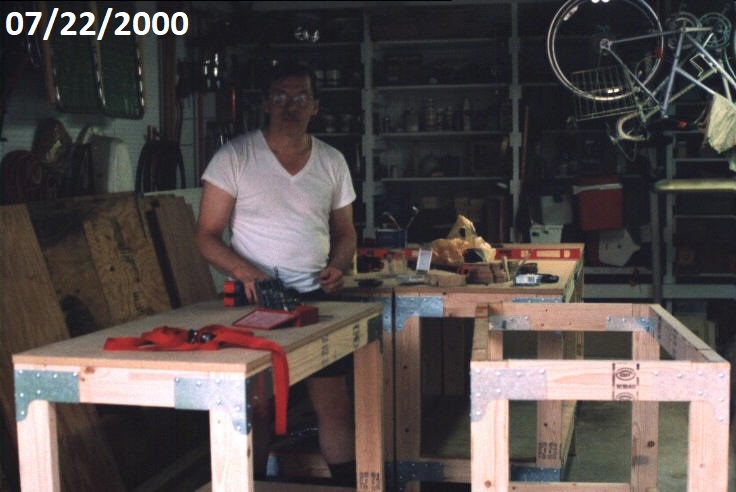 |
I used the best grade 2 x 4's I could find. The tables are built using a modular construction method. They are topped with 3/4 inch 2' x 4' MDF board. The lower shelf is 1/2 inch MDF board as well. The tables are then bolted together to form one large table. The tables are all leveled out using shims before the bolts are tightened. Lastly, 4ft x 4ft 3/4 inch MDF panels are screwed to the top to form a smooth top. |
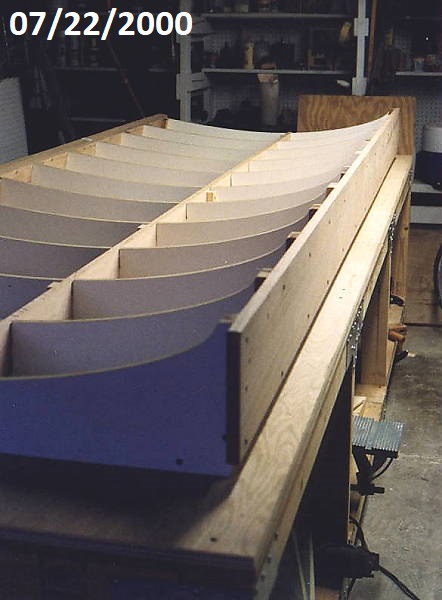 |
The result is a very sturdy and solid working platform which provides plenty of workspace and storage space below. It can be reconfigured as needed for future projects by removing the main top, unbolting the units and rebolting in the new configuration. |
| Wing Rib Jig | |
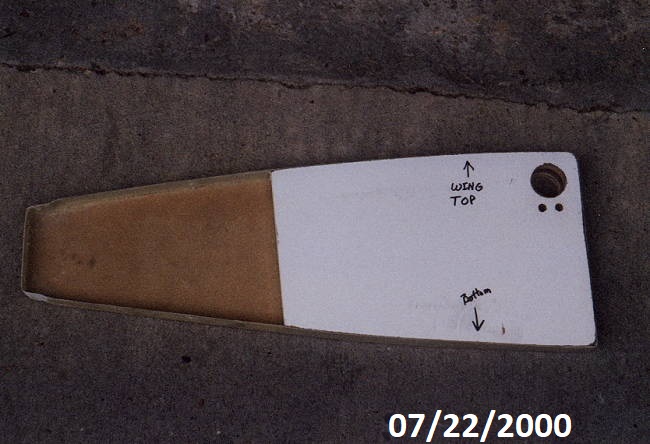 |
A very simple jig was cut from 5/8 inch scrap left over from construction of the wing jig. This was shaped to slip inside the large end of each of the rear wing ribs. Three holes were drilled to provide for the electrical conduit and pitot lines. Since the position of these holes can be the same for both wings the jig was used to produce the holes in all the ribs at one time. It only took a few minutes to cut the jig using the band saw and use it to position all the holes. |
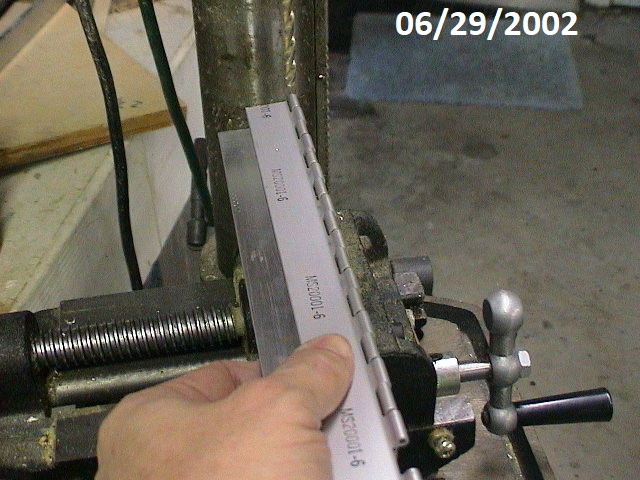
| Hinge Drilling Jig | |
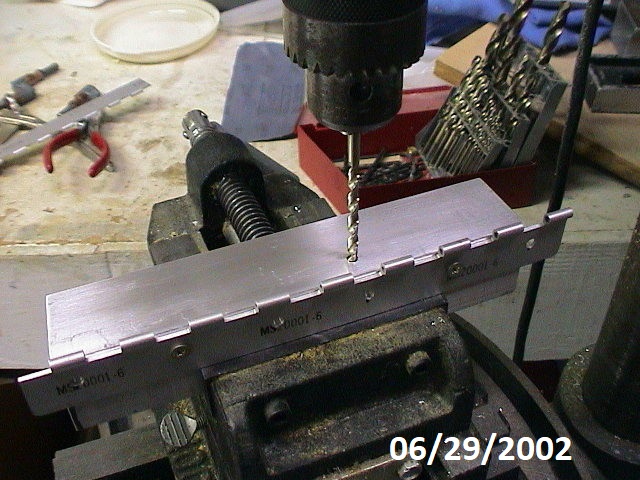 |
Trying to accurately space the screw holes for the hinges proved to be less than desired using the method outlined in the builders manual. First, I didn't like the spacing of 1.5 inches. Second, the jig was not all that accurate. I prefered the method of putting each screw in the position of greatest strength for the hinge. This means the screws are not aligned in each side of the hinge but that is not a real concern since I will be covering the screw heads anyway. |
 |
Using a 1-1/2 inch aluminum angle I attached one side of a hinge to the angle. I then positioned the jig in the vise so that I could locate the drill hole. This will be used for all future alignment of the jig. After this all that is needed is to place each side of the hinge into the jig and move it one position (1 inch) at a time and drill the next hole. Make sure and hold the hinge tightly against the jig. I would also recommend that you position the jig crosswise to the drill press and not into the press as shown. |
 |
|
