Conversion of Piper brake pedals for use in the KIS
Bill Schertz, KIS Cruiser #4045, October, 2000
One of the things that I was not satisfied with were the brake pedals that came with the kit. They were a shallow-stamped sheet metal affair that just looked "chintzy". Also, there had been a number of complaints of poor braking action in some of the completed 2 2-place planes. This was partially attributed to lack of leverage from the pedals.
I desired to make bigger pedals, and there are a couple of examples on Bob Reed’s web page. Bob himself modified the stock pedals, as did O.C. Baker. I considered this, but when scrounging through the fly-market at Oshkosh, I came across some used Piper aircraft pedals. They were light, cast Aluminum (maybe with some Magnesium in them), and the holes looked to be about the right size to fit on the existing pedal assembly. So I bought them.
When I started to see how they could be adapted, they required a little work, but not too bad. The existing holes were larger than the ¾" tubing the pedal assembly was made from, and smaller than the bushings supplied by KIS for the existing brake pedals. I drilled out the existing holes to 7/8", so the bushings would fit, and I fabricated an aluminum arm to be riveted onto the pedal to actuate the brake cylinder. The spacing of the support holes was a little longer than the existing rod also, so I machined down a ¾" bolt to fit inside, and extend the tubing. This also serves as a "keeper" for the brake pedal.
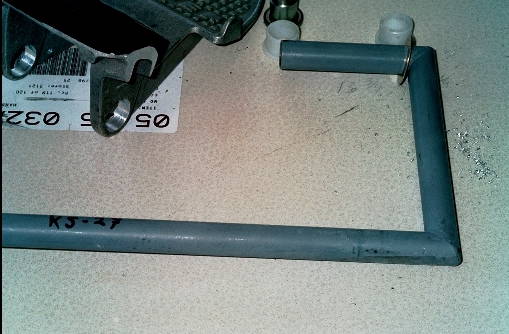
Here you can see the machined plug for the end of the tubing that extends it, and the bushings from the standard pedal that will be inserted in the pedal holes
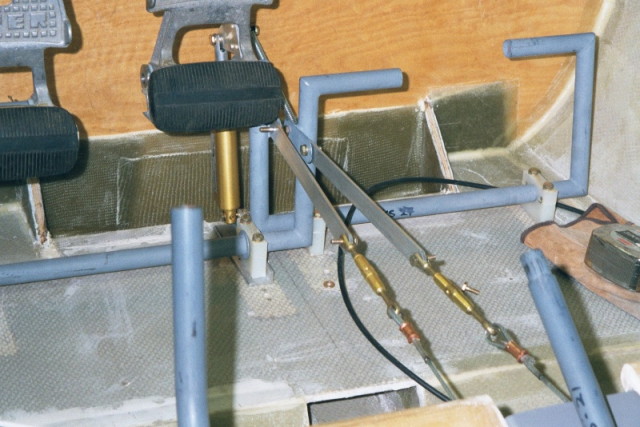
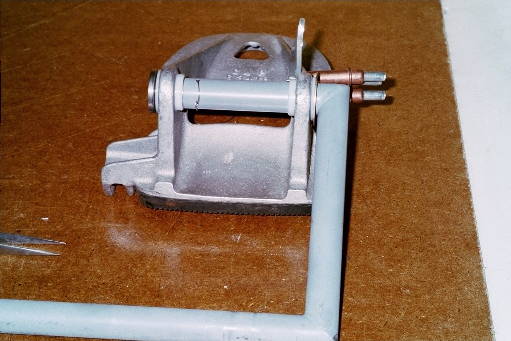
Here the plug is inserted into the tubing, and you can also see the bushings inserted into the pedal. The brake actuating arm is barely visible at the top of the picture, held on by clecoes until I can rivit it.
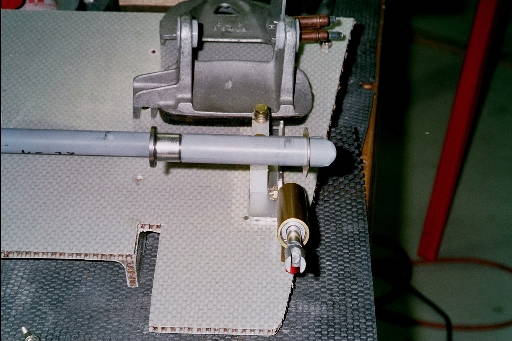
Here is a close-up of the pedal --assembled. The machined plug on the end
of the tubing fits inside the tubing, and then I drill a hole for safety
wire or a cotter pin through the assembly to retain it. The plug was machined
from a ¾" bolt, cutting off the flats and turning down the diameter.
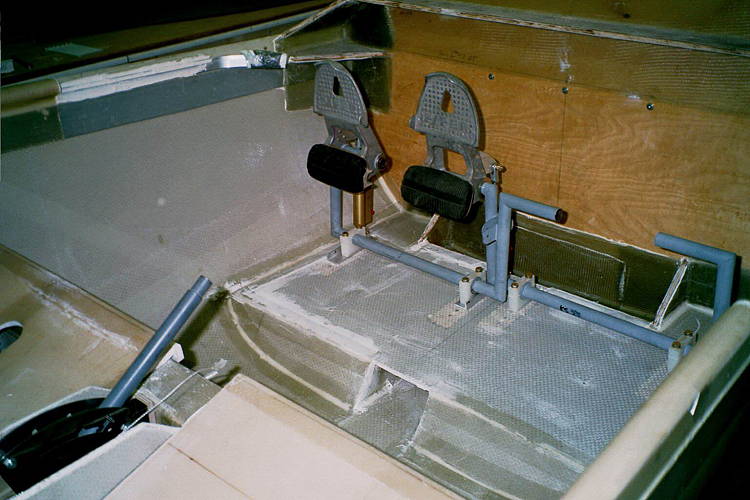
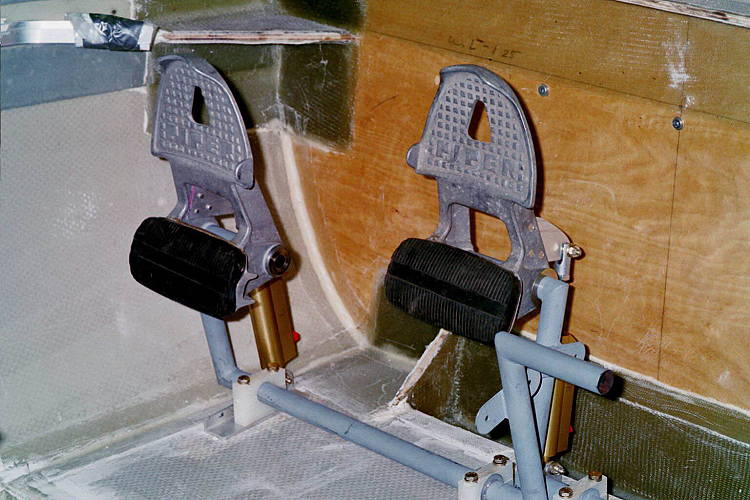
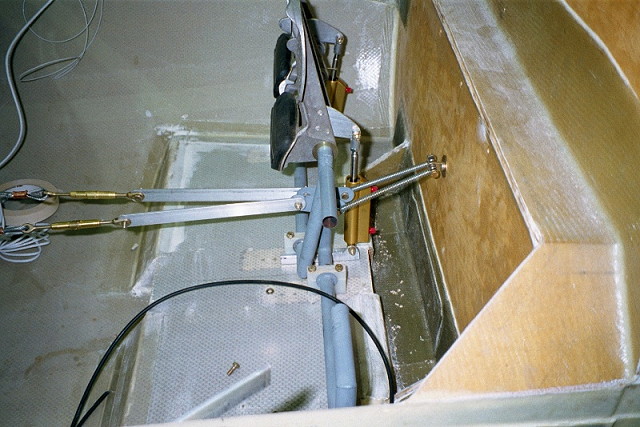
The final installed pedals can be seen in these two photos.
They should give me more leverage than the standard, but I will have to see how it all works out when I start taxiing (in how many years?)